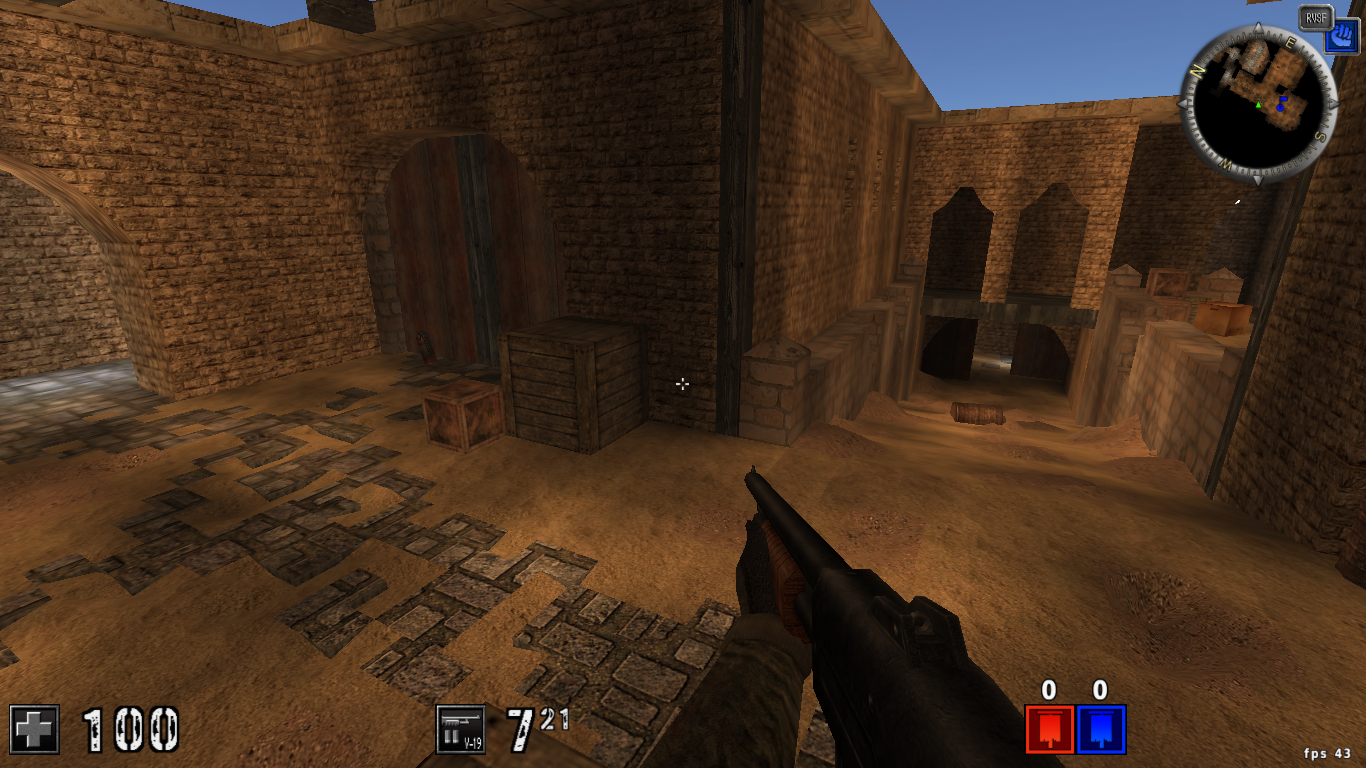
MTP-57 Assault Rifle
Damage (close range): 22
Damage (far range): ~15
Ammo per clip: 20
Maximum clips: 4
Reload time: 2000 ms
TBS: 120 ms
TTK: 600 ms
Default bind: 1
This guide starts by overviewing AssaultCube, and then proceeding to showing you how to configure it, make scripts and start your own dedicated server. Keep in mind that this is mostly a tutorial on how to configure and tweak AC to your liking, and merely an overview of the gameplay, not a guide on how to play it. Below is the table of contents, you can click on any link to jump to the respective section.
- Overview
- Configuration
- CubeScript
- Useful Scripts
- Starting a Dedicated Server
- Installation
- Tips
- Screenshots
- Resources
Overview
AssaultCube is a first-person shooter taking place over realistic environments. AC is completely free and
open-source, and comes with an amazing size of only ~ 50MB. It is available for Linux, Windows and OS X.
Version 1.2 was released on October 9, 2013, after three years of development, landing some nice new features. There are still some issues with 1.2.0.x, a few crashes, a problem with the /showscores command, however these will hopefully get fixed in future incremental releases.
Gameplay
The gameplay approach is a classic one: you basically run around trying to kill enemies. When not a FFA mode,
there are two teams, RVSF (Blue) and
CLA (Red).Trickjumps in AC are a little bit different, in that you will have to shoot the ground with your weapon in order to jump even farther away. All weapons give a small boost in speed if used properly, but most effective are the Assault Rifle and the Submachine Gun. This technique is called "rifle jumping" or "rifle sprinting". There are some really skilled players out there, very good at doing this.
Single-player & Multi-player
AC features both single-player with bots and online multi-player. The true fun is online, however you can
play single-player too in several modes like Deathmatch or Pistol Frenzy. Unfortunately CTF modes
are not available in bot single-player mode.
Game Modes
There are several game modes available. Here is a brief description for each of them:DM (Deathmatch) and TDM (Team Deathmatch)
You get weapons and grenades and have to kill any opponent (FFA). TDM is the same as DM, but with teams.
OSOK (One Shot One Kill) and TOSOK (Team One Shot One Kill)
This mode is similar to Instagib from other games. You start with 1 HP and a sniper rifle and have to kill any opponents by hitting them once. TOSOK is the same as OSOK, but with teams. TOSOK is probably the most popular mode for AssaultCube, simple, yet so addictive.
PF (Pistol Frenzy) and TPF (Team Pistol Frenzy)
You get a pistol, grenades and a knife and have to kill any opponent (FFA). TPF is the same as PF, but with teams.
LSS (Last Swiss Standing) and TLSS (Team Last Swiss Standing)
You get a knife and grenades and have to kill any opponent (FFA). TLSS is the same as LSS, but with teams.
Survival
The last player who survives wins the game.
TS (Team Survivor)
There are no pick-ups in this mode, so you will have to survive with only the weapon clips and health you get at the beginning of the round. Also, there are no grenades available. The team of the last player who survives wins the round.
CTF (Capture the Flag)
This is the popular Capture the Flag mode. There are two teams, and your team has to capture the enemy flag and bring it to your own flag to score. The team with most flags captured in the end wins.
KTF (Keep the Flag) and TKTF (Team Keep the Flag)
There is only one flag and everybody battles for it. Every 15 seconds that you keep the flag you will score.
HTF (Hunt the Flag)
There are two teams, each trying to kill the enemy flag bearer while your own flag is taken by your own team.
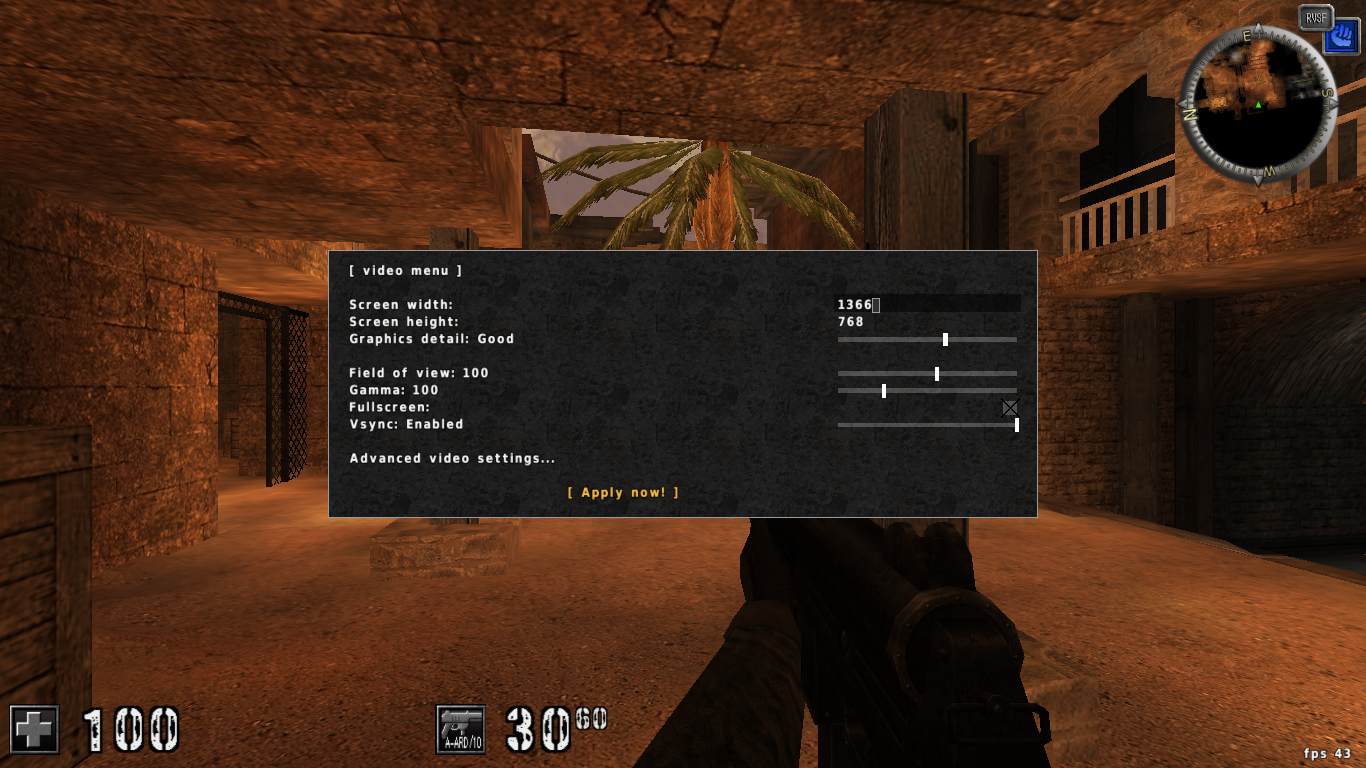
Settings
The settings menu allows you to configure pretty much any major aspect of AssaultCube, including resolution,
graphics details, sound settings and player settings.Video settings
Starting a New Game
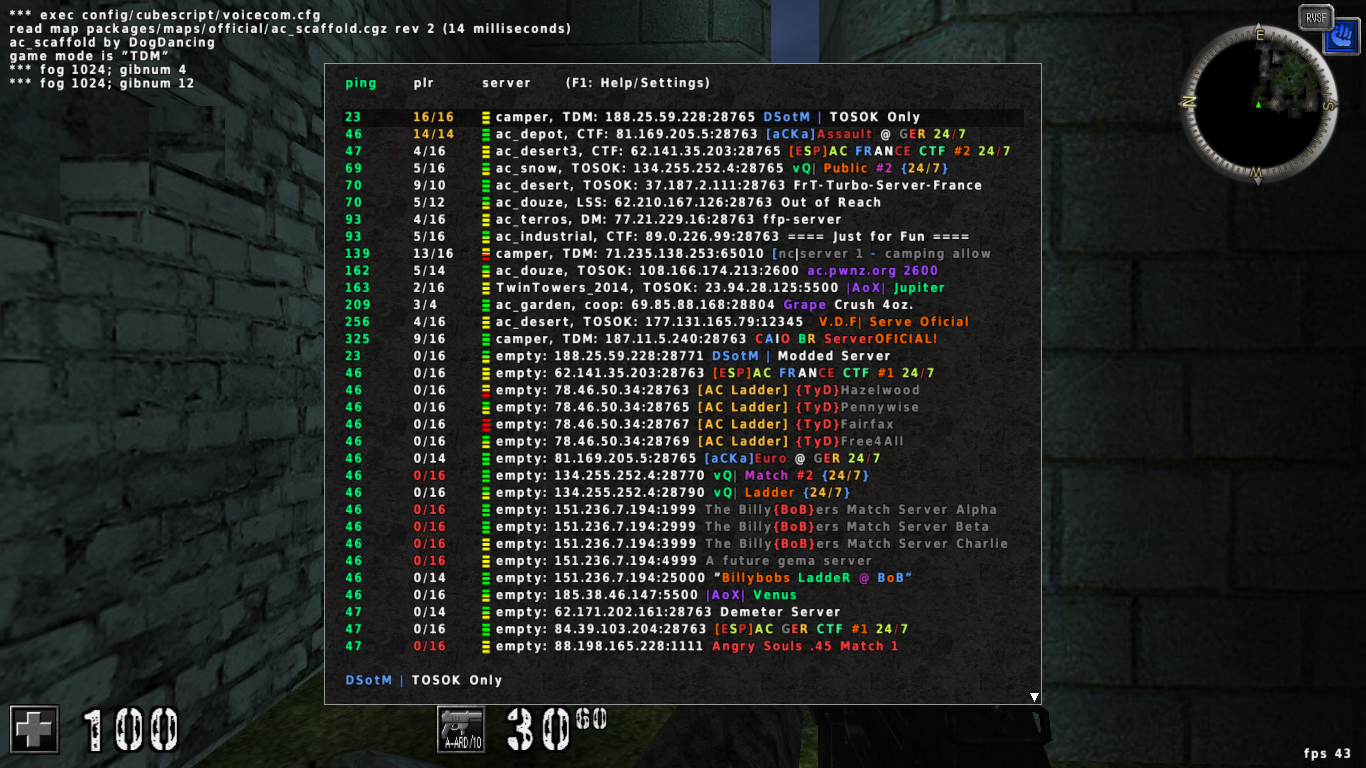
You can play AC in single-player mode with bots, however the real fun is playing online. To get online,
press Escape to go to the main menu, then select Multiplayer and hit Enter. A list of online games
will be shown - the server browser. This shows you the name and IP of the available servers that
you can join, the total amount of currently playing users and the number of maximum available slots.
Navigate with the arrows to a server that is not empty and hit Enter to connect to it. Notice that
servers which are listed in red are private and require a password to join.
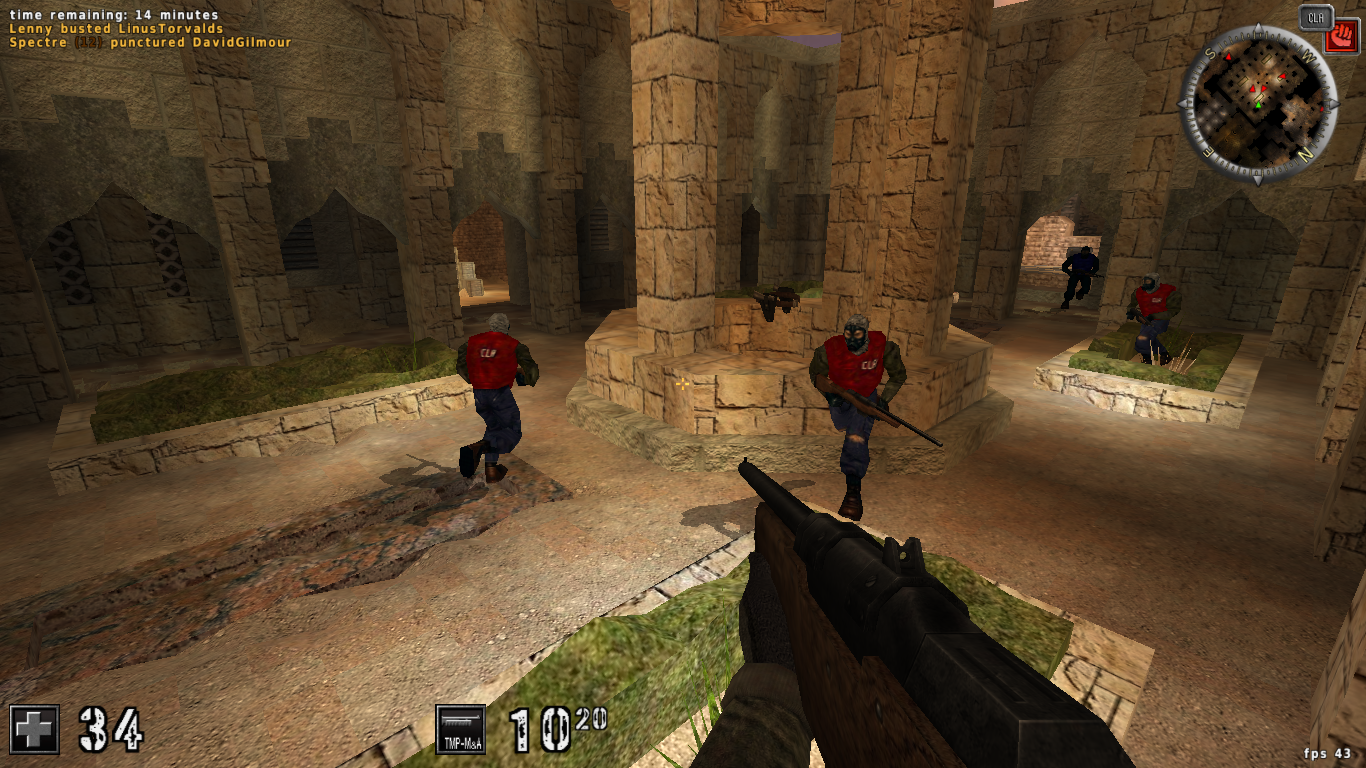
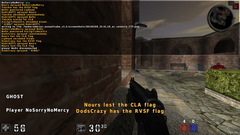
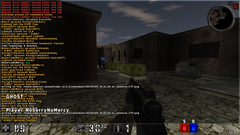
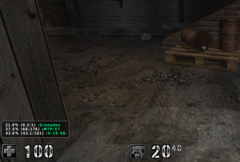
The HUD
The HUD (Heads Up Display) is located at the bottom side of the screen and shows information about
remaining health, status of weapons ammo and grenades. On the top-right side of the screen there
is the minimap, showing a preview of the current map and your location on it. You can also press
ALT to see a bigger version of the minimap. The minimap also shows the location of your teammates.The image below shows the HUD at the bottom, the minimap at the top-right side and the recent events status at the top-left side:

Below is the semi-transparent minimap when pressing ALT:
Scoreboard Table
By default, you can open the scoreboard by pressing TAB. In 1.2 there seems to be a bug though on some systems where
the scoreboard isn't displayed, I provided a fix here. So, let's have a look at what every column
in the scoreboard means.

The frags column tells us how many frags players have, that is, how many kills they did. For each kill you get a frag, with the exception of knife kills, which will give you two kills. The total number of frags per team is also displayed.
The deaths column shows how many times the respective player died. You can calculate the Kills/Deaths ratio by dividing the values of the frags and deaths columns.
The score column shows the player score. This is different from the number of frags for various reasons. For example, in CTF you get points for scoring with the flag.
The pj/ping column shows the packet jump delay in milliseconds as well as the actual ping (lag) the player has relatively to the server.
The cn column lists the player client number. This is unique for each player and given when the player joins the server. You can use the client number to kick/ban players or to send private messages. Since it's a unique ID, you can also use this in scripting.
Finally, the last column lists the nicknames of the players currently connected to the server.
The last line shows the IP, port and the name of the current server.
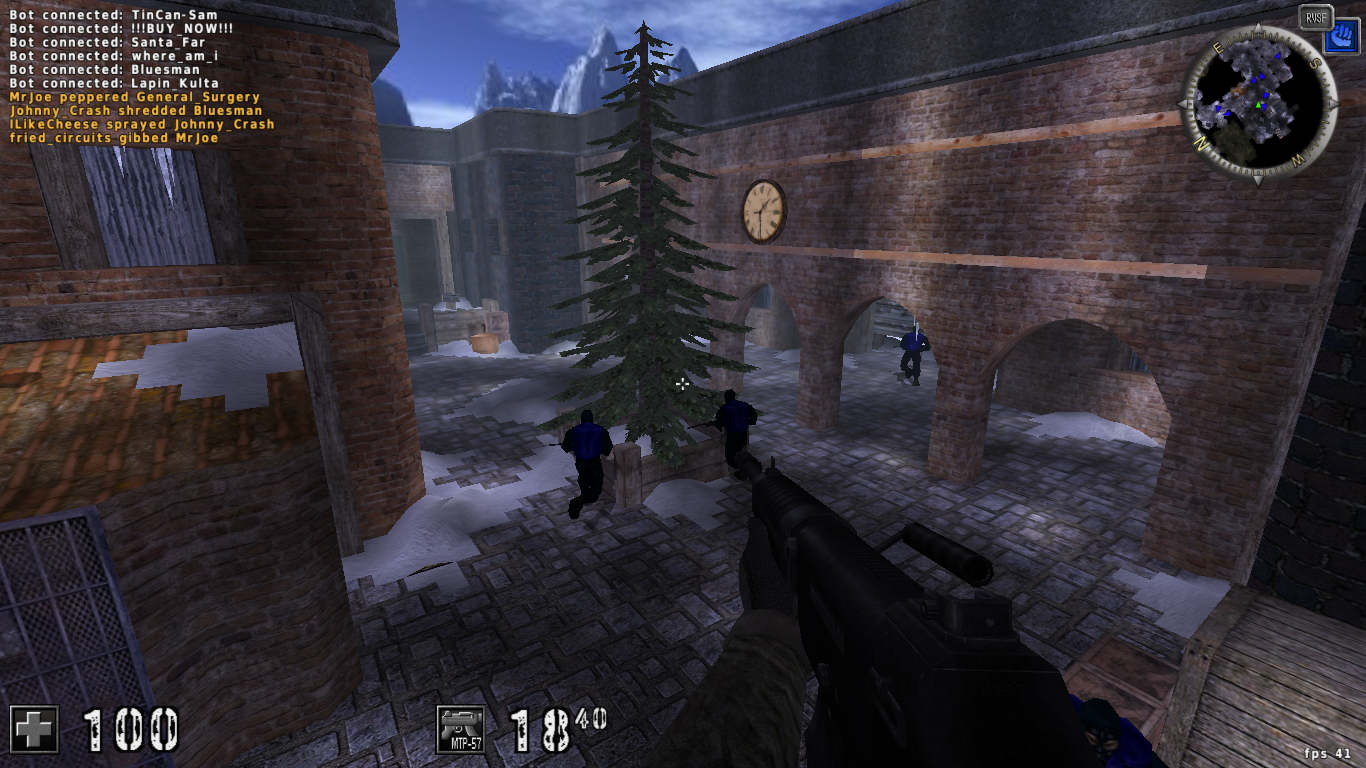
Weapons
In AssaultCube, hitting any part of the body will drain the same amount of
HP, no matter if it's a headshot or a
body shot (except for the Sniper Rifle headshot, which instantly gibs an opponent). This is why aiming in AC is a bit
different than in other shooters. In normal shooters you would usually aim somewhere around the chest or the neck, or even
the head to score a headshot, but in AC it is recommended to aim at the middle part of the body, especially with the Assault Rifle
or the SMG, since these weapons have a very high recoil and they do the same damage whether you hit your opponent in the leg
or in the chest. You can headshot your enemies only with the Sniper Rifle. This is will give you two frags. Gibbing an enemy with
the knife will also give you two frags instead of one. One of the greatest features of AC is the ability to
propel yourself or get an extra boost when jumping by firing the weapons. This is called
"rifle sprinting" and any respectable player uses it, especially in CTF modes.Below is an overview of the available weapons. I included screenshots and data about the damage they do, ammo and clip capacity, as well as general information about each weapon. Important information is provided by the TTK (Time to Kill) value, given in milliseconds, assuming all shots are successful hits and the opponent has 100 HP and no armor. However, keep in mind that although the Assault Rifle has a good TTK value, it also has a high recoil and getting only hits can be pretty hard, especially at medium to high range. You will have to learn to use different weapons for different purposes, also depending on the current mode and map. The TBS may also be referred to as ATD.
Damage (close-range vs far-range)
Damage at close range is the maximum damage the respective weapon can inflict. The far range damage I specified here may not be 100% accurate. I calculated it on ac_douze, by counting the number of shots needed to kill an unarmored bot on the other side of the map and dividing 100 by the respective number of shots. (Maybe the middle-way on ac_shine would've been better?) An interesting observation here is that the AR damage decreases by approximately 30% at far range, while the SMG damage drastically decreases by approximately 60%, from a maximum of 16 to ~7 damage. The Carbine's damage doesn't seem to decrease much, still being able to kill an enemy in 2 hits, while the Shotgun is (obviously, since it has a high spread) almost completely useless in far range battles, needing at least 5 successful hits to kill. The Pistol is also a very bad choice for far-range combats, since it barely does ~5 damage per shot.
The assault rifle (or AR for short) has a rather big recoil and good firepower. Since the recoil is very high, it
is particularly useful in close-range combats. It's the most used gun for jumping higher by aiming at the ground.
It can also be used successfully to get a speed edge, for example in CTF modes, when running away backwards with the enemy
flag. The AR needs 5 hits to kill an unarmored enemy. (Default kill message: shredded)
A-ARD/10 Submachine Gun
Damage (close range): 16
Damage (far range): ~7
Ammo per clip: 30
Maximum clips: 4
Reload time: 1650 ms
TBS: 80 ms
TTK: 560 ms
Default bind: 1
Damage (close range): 16
Damage (far range): ~7
Ammo per clip: 30
Maximum clips: 4
Reload time: 1650 ms
TBS: 80 ms
TTK: 560 ms
Default bind: 1
The SMG is similar to the Assault Rifle, but it deals less damage. It can also be used to get an edge in jumping
and speed. The SMG needs 7 hits to kill an unarmored enemy. (Default kill message: sprayed)
Precision Tech AD-81 Sniper Rifle
Damage: 82
Ammo per clip: 5
Maximum clips: 4
Reload time: 1950 ms
TBS: 1500 ms
TTK: 1500 ms
Default bind: 1
Damage: 82
Ammo per clip: 5
Maximum clips: 4
Reload time: 1950 ms
TBS: 1500 ms
TTK: 1500 ms
Default bind: 1
The Sniper Rifle (SR) provides a scope when you right-click, so you can see enemies far away. You can also shoot
without a scope, and there are many good players out there who rarely use the scope, not even for far range.
The sniper rifle is the only gun available in the OSOK and TOSOK modes, where you kill your enemy with one shot.
The SR needs 2 hits to kill an unarmored enemy, so a good tactic would be to get a hit then pull out the pistol, since
an SR hit plus a pistol hit will kill an unarmored enemy. (Default kill message: punctured, headshot)
V-19 Combat Shotgun
Damage (close range): 155
Ammo per clip: 7
Maximum clips: 4
Reload time: 2400 ms
TBS: 880 ms
TTK: 0 ms
Default bind: 1
Damage (close range): 155
Ammo per clip: 7
Maximum clips: 4
Reload time: 2400 ms
TBS: 880 ms
TTK: 0 ms
Default bind: 1
The Combat Shotgun sprays about ten bullets each shot and it is extremely effective at close-range combat, being able
to kill an enemy in one shot. On maps with narrow corridors a good player can get an accuracy of over 40% with this weapon.
The SG needs 1 close proximity hit to kill an unarmored enemy.
(Default kill message: peppered, splattered)
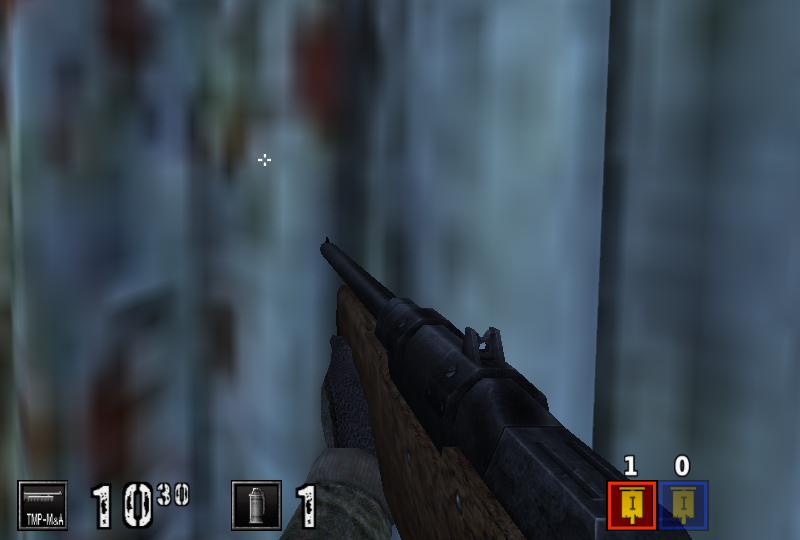
TMP-M&A Carbine
Damage (close range): 60
Ammo per clip: 10
Maximum clips: 4
Reload time: 1800 ms
TBS: 720 ms
TTK: 720 ms
Default bind: 1
Damage (close range): 60
Ammo per clip: 10
Maximum clips: 4
Reload time: 1800 ms
TBS: 720 ms
TTK: 720 ms
Default bind: 1
The carbine can kill an enemy with two shots if they're not wearing armor. It is a very powerful weapon,
which doesn't lose accuracy with distance. You can shoot far away and still do considerable damage.
The Carbine needs 2 hits to kill an unarmored enemy. (Default kill message: picked off)
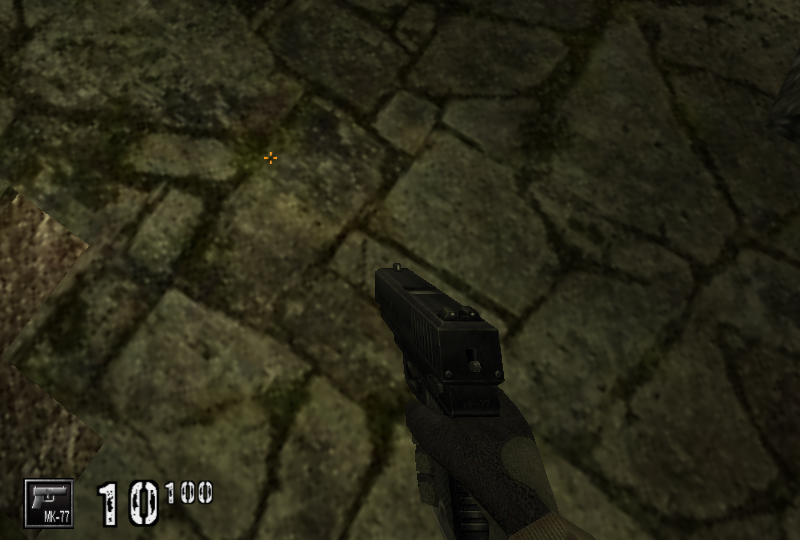
MK-77 Semi-Automatic Pistol
Damage (close range): 18
Damage (far range): ~5
Ammo per clip: 10
Maximum clips: 11
Reload time: 1400 ms
TBS: 160 ms
TTK: 960 ms
Default bind: 2
Damage (close range): 18
Damage (far range): ~5
Ammo per clip: 10
Maximum clips: 11
Reload time: 1400 ms
TBS: 160 ms
TTK: 960 ms
Default bind: 2
The pistol can be used as a last resort when your SMG runs out of ammo or you need to reload it. It has a low damage
rate at far range (only 8 HP), but at close range it will do 17 damage, so you will only need 6 shots to kill your
opponent (if he's not wearing a kevlar or helmet), just like the Assault SMG. The pistol clip capacity was increased
in AC 1.2 from 8 to 10, making it a bit stronger since it will take longer to empty the clip. The Pistol needs
6 hits to kill an unarmored enemy. (Default kill message: busted)
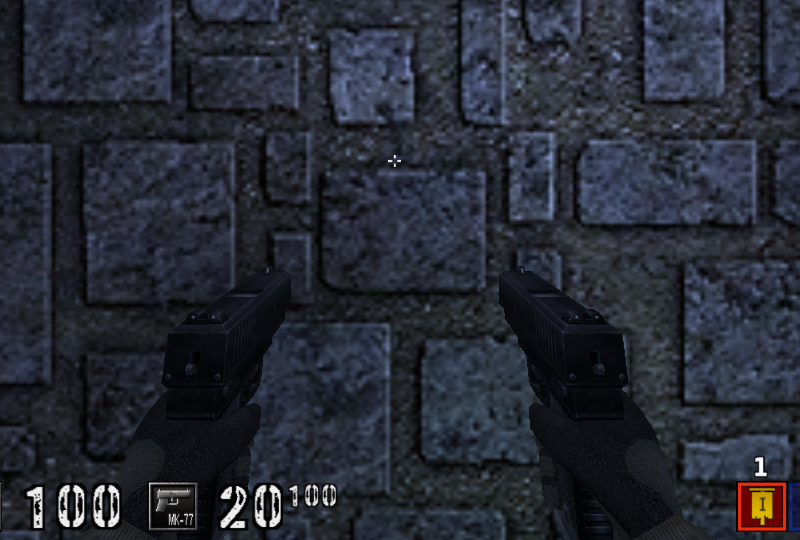
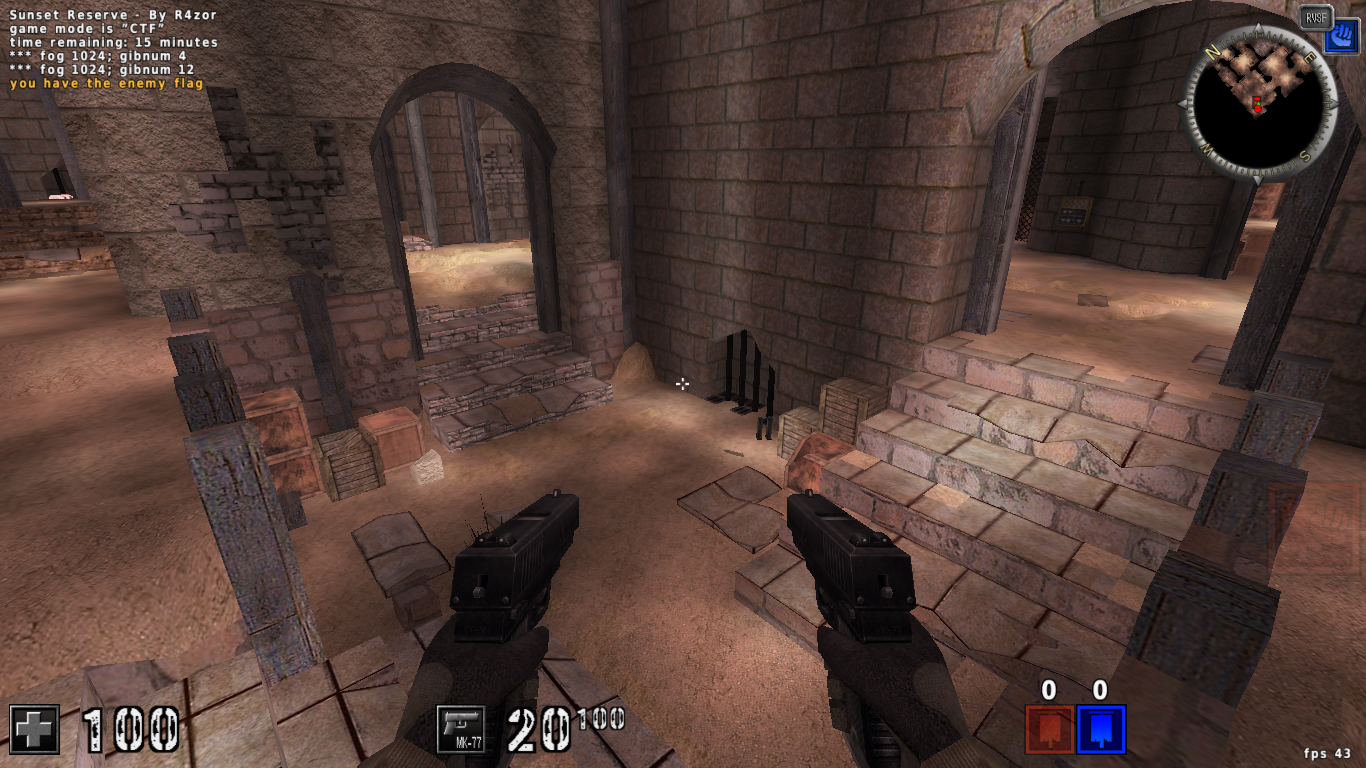
Akimbo Pistols
Damage (close range): 18
Ammo per clip: 20
Maximum clips: 6
Reload time: 1400 ms
TBS: 80 ms
TTK: 480 ms
Default bind: 2
Damage (close range): 18
Ammo per clip: 20
Maximum clips: 6
Reload time: 1400 ms
TBS: 80 ms
TTK: 480 ms
Default bind: 2
The Akimbo is available for pick-up and can't be equipped at the start of the round. These are two pistols which
fire at very great rate, depleting fast and dealing huge damage in a short amount of time. Since you will deplete
your cartridge in just about over a second, aim carefully when using this weapon. The Akimbo needs 6 hits
to kill an unarmored enemy. (Default kill message: busted)
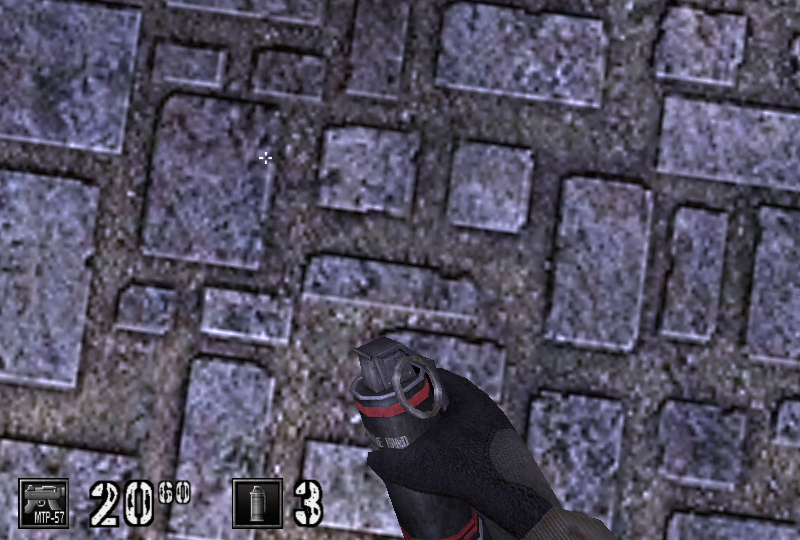
Grenade
Damage (close range): 200
Maximum grenades: 3
Reload time: 1000 ms
TBS: 650 ms
TTK: 0 ms
Default bind: 3
Damage (close range): 200
Maximum grenades: 3
Reload time: 1000 ms
TBS: 650 ms
TTK: 0 ms
Default bind: 3
Grenades can instantly kill an enemy if he is right near the grenade. Use them wisely, since they have a rather
small area of effect. A grenade will explode three seconds after it was thrown. The TTK obviously depends
on this. (Default kill message: gibbed)
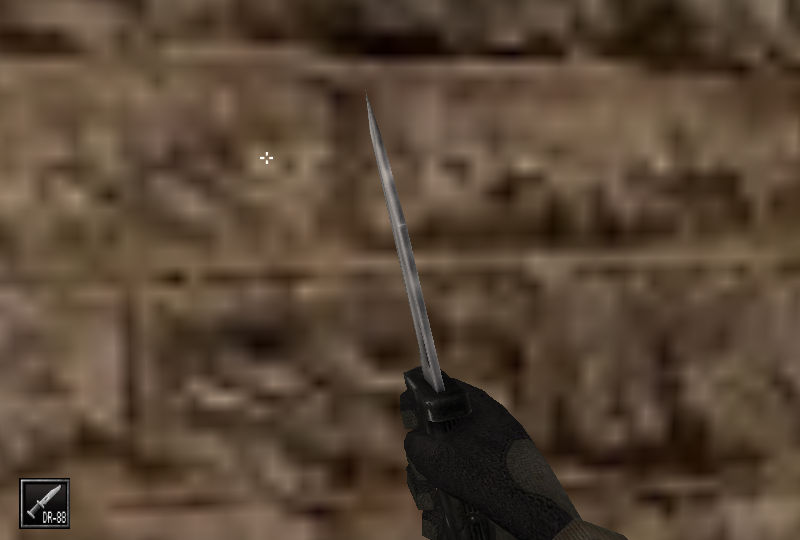
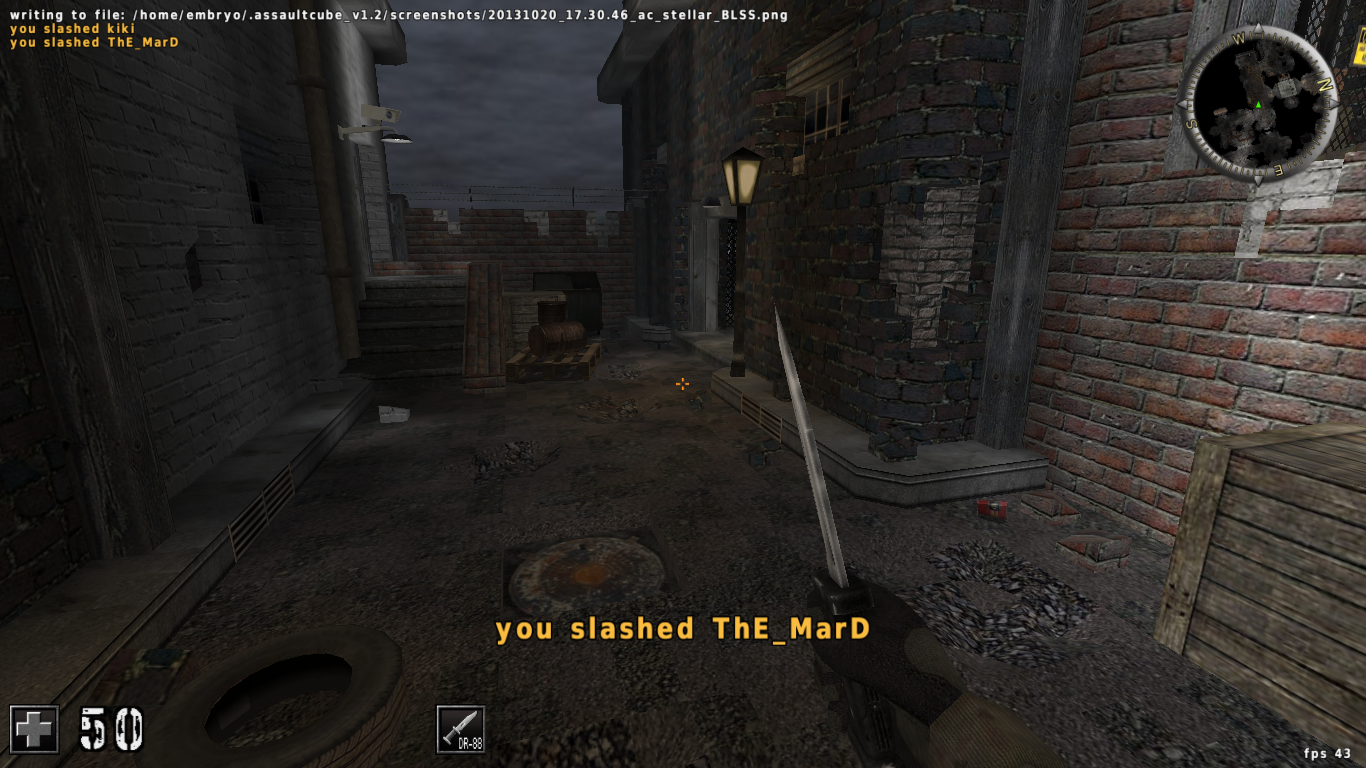
Swiss Tech Combat Blade DR-88
Damage: 50
Reload time: -
TBS: 500 ms
TTK: 500 ms
Default bind: 4
Damage: 50
Reload time: -
TBS: 500 ms
TTK: 500 ms
Default bind: 4
Knives need two shots to kill an enemy in Deathmatch. So if you are skilled in sneaking around, you could do a good
job with a knife. Killing an enemy with a knife counts as two frags. In OSOK or TOSOK, a knife hit will gib an enemy
instantly (since all players have 1 HP in these modes). The splash sound and effect when knifing down an enemy
is quite addictive ;) (Default kill message: slashed)
Pick-Ups
Before listing the available pick-ups, let's first take a look at how armor works and the importance of armor pick-ups.Armor
There is a pretty simple scheme on how armor works. You can have a maximum of 100 armor, and there is a threshold over which damage taken is reduced. So, if you have 0 armor you will take full damage. If you have 1-25 armor you will have 16% protection. If you have 26-50 armor you will have 33% protection, if you have 51-75 armor you will have 37% protection, and if you have 76-100 armor you will have 41% protection. Remaining damage which is not drained from your HP is deducted from your armor.
Here is a list, according to the official game info:
- 0-25 armor gives 16% protection
- 26-50 armor gives 33% protection
- 51-75 armor gives 37% protection
- 76-100 armor gives 41% protection

Helmet
Armor: 25
Respawn time: 25 s
Armor: 25
Respawn time: 25 s
The helmet provides +25 armor, reducing taken damage.

Kevlar Vest
Armor: 50
Respawn time: 25 s
Armor: 50
Respawn time: 25 s
The vest provides +50 armor, reducing taken damage. The difference between the helmet and the vest is exclusively the
quantity of armor provided.

Health Pack
Health: 33
Respawn time: 20 s (1-2 players), 15 s (3-4 players), 10 s (5+ players)
Health: 33
Respawn time: 20 s (1-2 players), 15 s (3-4 players), 10 s (5+ players)
The health pack restores 33 hit points. The respawn time depends on the number of players in match at that respective time.

Ammo Box
Ammo: 2 clips
Respawn time: 8 s (1-2 players), 6 s (3-4 players), 4 s (5+ players)
Ammo: 2 clips
Respawn time: 8 s (1-2 players), 6 s (3-4 players), 4 s (5+ players)
The ammo pack provides 2 ammo clips for all guns (except for the pistol).
The respawn time depends on the number of players in match at that respective time.

Pistol magazine
Bullets: 2 clips
Respawn time: 8 s (1-2 players), 6 s (3-4 players), 4 s (5+ players)
Bullets: 2 clips
Respawn time: 8 s (1-2 players), 6 s (3-4 players), 4 s (5+ players)
The bullets pack provides 2 bullet clips for the pistol. This is probably the least needed pick-up, since
usually you won't need extra bullets during a round, but this varies from player to player, especially if
you are using the SR and pistol combo. The respawn time depends on the number of players in match at that respective time.

Akimbo
Respawn time: 60 s
Respawn time: 60 s
This pick-up gives you the Akimbo pistols for 30 seconds.
See the weapons section above for a complete Akimbo reference.
Configuration
Most of the important settings can be configured via the in-game menus or by typing commands after pressing the
forward slash (/) key. However, this guide will also show you how to make your own scripts and use
config files (files ending in .cfg) for more elaborate options. In Linux, the local configuration
directory is $HOME/.assaultcube_v1.2, where $HOME is your home folder (e.g. /home/username)
and .assaultcube_v1.2 is a hidden folder inside your home folder. This directory contains the following
sub-folders:
- config - config files are stored here
- screenshots - screenshots are stored here
- packages - additional maps and textures are stored here
execdir config/myscripts
Now all scripts located in .cfg files inside the $HOME/.assaultcube_v1.2/config/myscripts directory
will also be executed. This helps to separate your various scripts in various files, instead of having
only one, very long file with all your commands inside it.
Default Key Bindings
The following screenshot shows the default key binds:
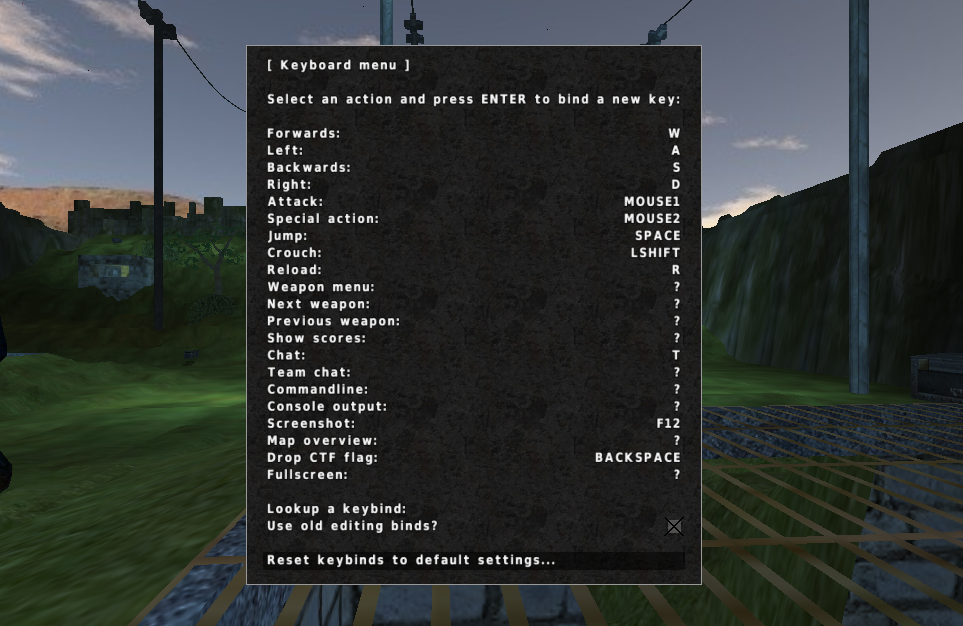
- Forwards: W
- Left: A
- Backwards: S
- Right: D
- Attack: MOUSE1
- Special action: MOUSE2
- Jump: SPACE
- Crouch: LSHIFT
- Reload: R
- Screenshot: F12
- Drop CTF flag: BACKSPACE
Binding New Keys
You can bind new keys to actions or even scripting aliases, or radio calls. To bind a new key, use the following command:
bind KEY [COMMAND]
For example, to bind B to open the Voice Com menu, you can use bind B [showmenu voicecom]. Or, to bind new movement
keys (like ESDF instead of the default WASD), you could use this:
bind E [forward]
bind S [left]
bind D [backward]
bind F [right]
fps = 0
alias myfps [
  if (= $fps 0) [
    maxfps 28
    fps = 1
    echo "*** maxfps 28"
  ][
    if (= $fps 1) [
      maxfps 43
      fps = 2
      echo "*** maxfps 43"
    ][
      maxfps 60
      fps = 0
      echo "*** maxfps 60"
    ]
  ]
]
bind O [myfps]
Commands
The complete list can be found here.
I will only mention the commands which I find most important, as they come listed in the in-game help. To type in
a command within the game, press the forward slash (/) character and type the command. These commands
can also be put inside configuration files, but this is explained later.
fov N
N - The FOV value (min 75/max 120/default 90)
Sets the field of view (fov).

N - The FOV value (min 75/max 120/default 90)
Sets the field of view (fov).
fov 110
The fov sets how much of the environment you can see. The greater it is, the more you will be able to see, but
things will also appear more distant. Take a look at the following two screenshots to see the difference of
the same frame using fov 100 and fov 120:

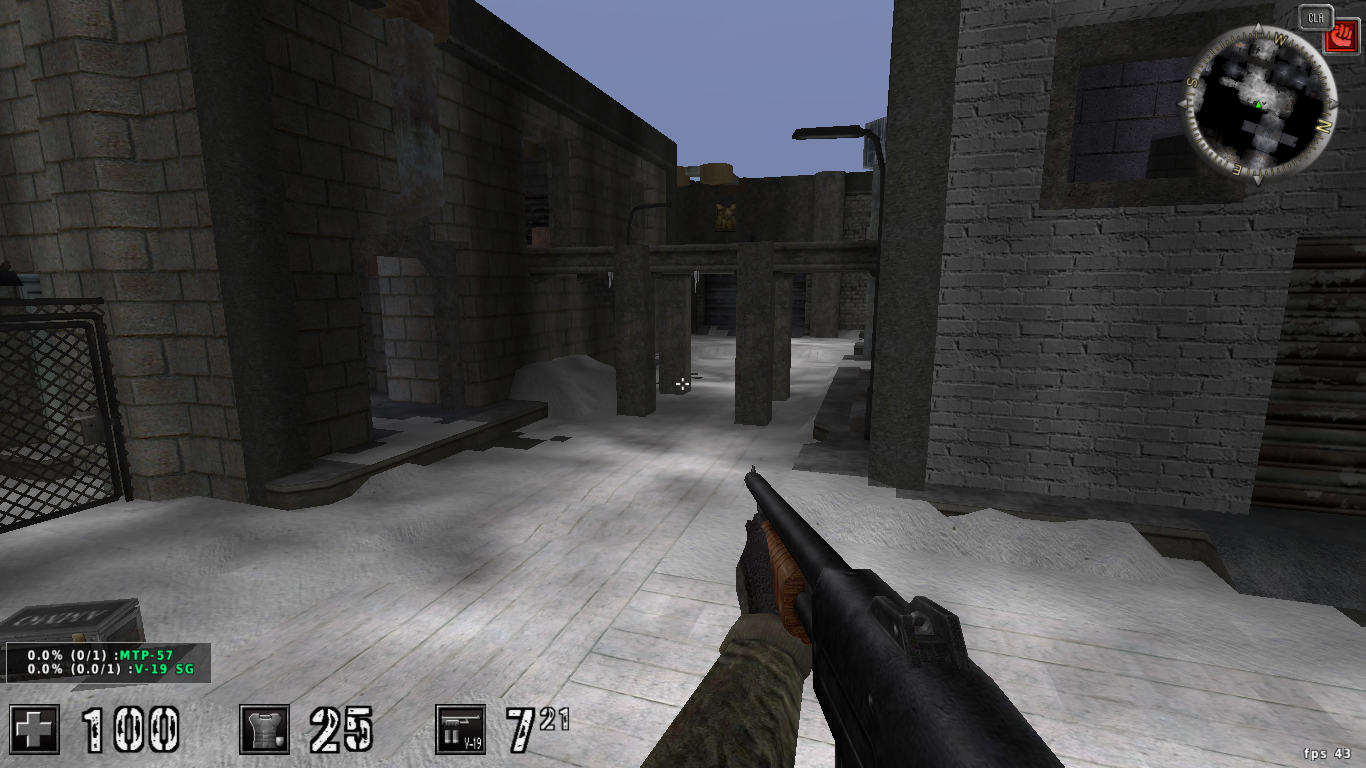
fog N
N - The fog distance (64...1024, default is 180)
Sets the fog distance.

N - The fog distance (64...1024, default is 180)
Sets the fog distance.
fog 512
The fog value sets at what distance things will start to appear foggy. The default value of 180 is OK for most maps, however
this value may need to be increased for maps with wide areas in range. Notice that the default value of 180 is overriden
on a per map basis by the map's respective .cfg file. You can use the mapstartalways and checkinit mapstartalways
to override the values specified in the .cfg file. Have a look at the following screenshots to see the difference between
fog 180 and fog 1024 (maximum):

cleanshot
Take a "clean" screenshot with no HUD items.

Take a "clean" screenshot with no HUD items.
cleanshot
This command can be used to take screenshots without the HUD, current weapon, crosshair, minimap or console messages. The
result will be the current frame. See the following two screenshots to see the difference between a normal
screenshot taken using the screenshot command and a cleanshot screenshot:
maxfps V
V - Maximum FPS (0 disables maxfps min 25 or 0/max 200/default 200)
Limits the FPS (frames per second) of the game.
V - Maximum FPS (0 disables maxfps min 25 or 0/max 200/default 200)
Limits the FPS (frames per second) of the game.
fpsmax 43
You can use it to cap your fps to a lower value on a slow system so your FPS will not increase and
drop suddenly making it harder to play and not pleasing to the eye.
sensitivity S
S - The sensitivity (floating-point)
Sets the mouse sensitivity.
S - The sensitivity (floating-point)
Sets the mouse sensitivity.
sensitivity 4.2
This command sets the mouse sensitivity, you can use floating-point values (like 5.2 for example).
Some players prefer a low sensitivity like 2 or 3, others are more comfortable with a sensitivity of 6 or 7.
I recommend to set this so you can do a 180-degree turn comfortably without the need of raising your mouse
off the desk.
pm C L
C - Client number
L - List of strings
Sends a private message to a specified client.
C - Client number
L - List of strings
Sends a private message to a specified client.
pm 9 Hi there, what's up lately?
This command can be used to send a private message to another player on the same server. You will have to
specify the client number (as taken from the scoreboard table) and a message. Only you and him can see
this message. It is recommended that you use private messages for private talk or dialogue which takes
place in another language than the one used publicly on the server. This command seems to have problems displaying
double-quotes or the [ and ] characters.
fullconsize V
V - Number of text lines (min 0/max 100/default 40)
Sets the number of text lines on the F11 history display.
V - Number of text lines (min 0/max 100/default 40)
Sets the number of text lines on the F11 history display.
fullconsize 92
This commands sets the number of lines the console will display. I believe this is a percentage value out of
the screen height. See the difference between fullconsize 40 (the default)
and fullconsize 92:

accuracy N
N - Boolean value (1/0/default 0)
Shows weapon accuracy statistics.
N - Boolean value (1/0/default 0)
Shows weapon accuracy statistics.
accuracy 1
This command will show accuracy statistics for all the weapons which you have used (hits/shots ratio). Version 1.2
includes statistics for grenades too. These will have lower values if you use weapons to propel yourself or
if you're doing trickjumps, hence, shooting at the ground instead of hitting enemies. The following screenshot shows
the accuracy in the lower-left corner of the screen:

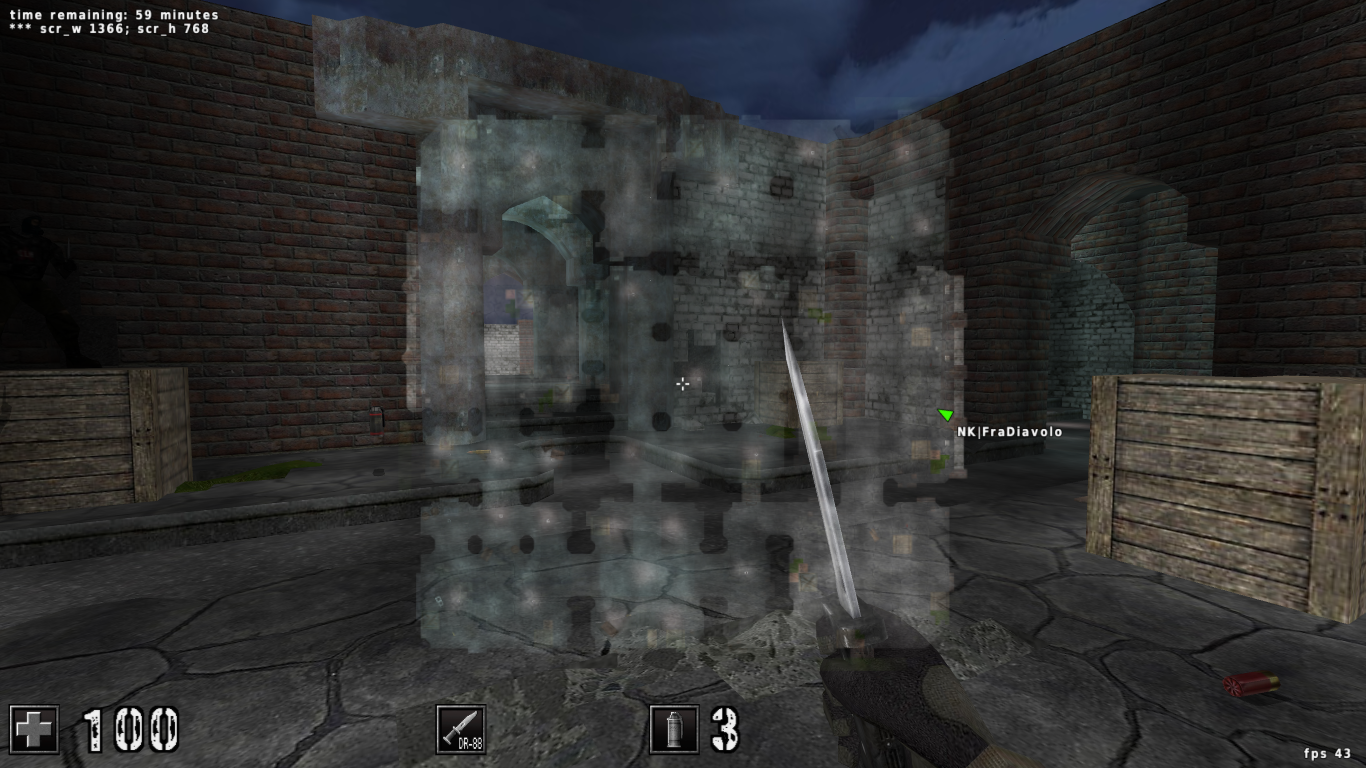
gibnum N
N - Number of gibs (min 0/max 1000/default 6)
Sets the number of gibs to display when performing a "messy" kill (grenade, knife, sniper headshot).
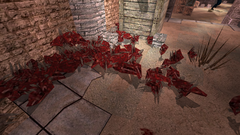
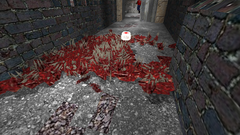
N - Number of gibs (min 0/max 1000/default 6)
Sets the number of gibs to display when performing a "messy" kill (grenade, knife, sniper headshot).
gibnum 12
Lower values increase performance, and a big value may drastically reduce FPS on not so powerful systems.
Here's two screenshots taken after gibbing an opponent and having
gibnum set to 256 in the first screenshot and 1000 (maximum) in the second:


maxroll N
N - The roll value (min 0/max 20/default 0)
Sets the maximum value the display will roll on strafing.
N - The roll value (min 0/max 20/default 0)
Sets the maximum value the display will roll on strafing.
maxroll 20
This will have a "tilt" effect when strafing, which according to some players may be useful in OSOK or TOSOK modes.
gamma N
N - The gamma value (min 30/max 300/default 100)
Sets the hardware gamma value.
N - The gamma value (min 30/max 300/default 100)
Sets the hardware gamma value.
gamma 120
This commands sets the gamma, the overall brightness of the scenes. Intel graphics cards don't support this on Linux.
lightscale N
N - The brightness of the scene (min 1/max 100/default 4)
Used to finetune the "overbright lighting" rendering feature when enabled.
N - The brightness of the scene (min 1/max 100/default 4)
Used to finetune the "overbright lighting" rendering feature when enabled.
lightscale 3
This command sets the brightness of the scenes. The default value is 4, and lower values increase brightness. After changing
this value, you will have to run the recalc command to see the differences. Have a look below at the difference
between the default lightscale of 4 and a value of 2:

screenshotscale S
S - Scale (min 0.1/max 1.0/default 1.0)
Scales screenshots by a given factor before saving. 1 = original size, 0.5 = half size, etc.
S - Scale (min 0.1/max 1.0/default 1.0)
Scales screenshots by a given factor before saving. 1 = original size, 0.5 = half size, etc.
screenshotscale 0.2
This is very useful if you want your screenshots to be automatically resized. Unfortunately there seems
to be no command to scale screenshots by specifying pixel size.
Voting
The command to call a vote is callvote. All other commands which call a vote (e.g. kick,
shuffleteams, ctf or tosok) are aliases which use this command. These aliases
can be found inside the config/admin.cfg file located in the installation directory. Here are some
examples:Force player to spectate mode
callvote 5 CN 4
This calls a vote to force a CN (player) to spectate mode. The alias for this would be forceteam CN 4.Kick a player
callvote 0 CN REASON
This calls a vote to kick a player. The alias for this command is kick CN REASON.Load a new map
callvote 7 MAP MODE
There are aliases for each mode, see the example below.Load a map in CTF mode
ctf ac_gothic
All other modes can be called using their respective alias, for example tosok ac_desert for TOSOK,
lms ac_douze for Survival (LMS stands for Last Man Standing), or tktf ac_power for TKTF.CubeScript
CubeScript is the scripting language for AssaultCube, and it is almost like a complete programming language
(obviously, created for different purposes than regular programming languages).
CubeScript offers some powerful features which help configure AC in many ways and write some pretty
neat scripts which may come in handy in-game. Here
is a complete reference to CubeScript, but I will focus only on the important stuff here.Writing scripts for AssaultCube involves just a bit of programming knowledge. However, if you find the following hard to understand you can copy/paste scripts inside your configuration files, just make sure the source is reliable. Scripting gives access to commands which can be harmful if not properly used.
The ALIAS Command
alias [name] [command(s)]AC supports aliases as well. Aliases are shortcuts to commands created to ease your typing. You can create your custom aliases. For example:
alias hello [say "Hello there my fellow cubers!"]
Now all you have to do is type /hello and the message will be displayed, and you won't have to type all
that text every time you want to greet someone. Moreover, you can bind it to a key:
bind h [hello]
Now each time you press H, the hello alias will be executed, sending the greeting text to the other
players.
The IF Instruction
if (cond) [true instruction(s)] [false instruction(s)]This is the syntax of the if instruction. For example:
if (> 5 3) [echo "5 is bigger than 3"] [echo "5 is smaller than 3"]
Will output 5 is bigger than 3. Notice how the greater than operator comes first, followed
by the left and right values. You can put these commands inside the autoexec.cfg file,
or you can type them in-game when playing by pressing the forward slash (/) key, the default for typing
commands.Having the ability to use if instructions can be extremely useful. You can make practically whole scripts which will automatically change the behavior of the game depending on some factors. For example, you could change the brightness or the maximum fps cap depending on the currently loaded map.
The WHILE Instruction
while (cond) [instruction(s)]You have to be careful and avoid the infinite loops, because AC freezes if the condition passed to the while conditional makes it execute forever.
Useful Scripts
As already mentioned, scripts can be put inside the config/autoexec.cfg, or you can create a folder, say
config/myscripts, put all your scripts in there and add execdir config/myscripts inside autoexec.cfg.
Furthermore, you can create the scripts folder inside the $HOME/.assaultcube_v1.2 directory and put
all your scripts you want to be executed automatically when AC starts inside that folder. These scripts will be executed
in alphabetical order, before any other script. Commands inside autoexec.cfg will override these though, since
they are executed after.
Cycling Sensitivity Script
This script will cycle through four different sensitivity values when you press P, and it will echo the currently
selected value.
sens = 0
alias mysens [
  if (= $sens 0) [
    sensitivity 3.2
    sens = 1
    echo "*** sensitivity 3.2"
  ][
    if (= $sens 1) [
      sensitivity 4.2
      sens = 2
      echo "*** sensitivity 4.2"
    ][
      if (= $sens 2) [
        sensitivity 4.8
        sens = 3
        echo "*** sensitivity 4.8"
      ][
        if (= $sens 3) [
          sensitivity 5.2
          sens = 4
          echo "*** sensitivity 5.2"
        ][
          sensitivity 5.8
          sens = 0
          echo "*** sensitivity 5.8"
        ]
      ]
    ]
  ]
]
bind P [mysens]
Voice Radio Scripts
Nice shot!These are various scripts which will use the in-game audio chat messages, but will display custom text. For example, the following will say out loud "Nice shot", but will print three custom messages to other players, cycling them:
niceshot = 0
alias myniceshot [
  if (= $niceshot 0) [
    voicecom niceshot "Nice shot!"
    niceshot = 1
  ][
    if (= $niceshot 1) [
      voicecom niceshot "Great shot!"
      niceshot = 2
    ][
      voicecom niceshot "Good one!"
      niceshot = 0
    ]
  ]
]
bind KP_ENTER [myniceshot]
Good job, team!
Here is another one, for greeting your team:
goodjob = 0
alias mygoodjob [
  if (= $goodjob 0) [
    voicecom goodjobteam "Good job, team!"
    goodjob = 1
  ][
    if (= $goodjob 1) [
      voicecom goodjobteam "Great job, team!"
      goodjob = 2
    ][
      if (= $goodjob 2) [
        voicecom goodjobteam "Nice work, team!"
        goodjob = 3
      ][
        voicecom goodjobteam "Well done, team!"
        goodjob = 0
      ]
    ]
  ]
]
bind KP_PERIOD [mygoodjob]
Scoreboard Fix
On some systems (including mine) the TAB key for showing the scoreboard table doesn't seem to work. Here's a fix:
alias myscoreboard [showscores 1; onrelease [showscores 0]]
bind TAB [myscoreboard]
Switch to Spectator
There is an exploit in 1.2 which can render this short snippet as a "cheat". Intention here is to just have a quick bind for going
to spectate mode, do not use it to respawn faster since it's regarded as cheating:
bind RIGHT [suicide; sleep 800 [team spectator]]
By pressing the Right Arrow you will automatically kill yourself and change to spectate mode.
Fullscreen/Windowed Mode
This script can be used to switch between fullscreen mode and windowed mode. It's rather a workaround, since (at least on Linux), it
also needs an alias to set the resolution again, because sometimes when switching back to fullscreen, the actual screen size stays
smaller.
alias cr1366 [ scr_w 1366; scr_h 768; echo "*** scr_w 1366; scr_h 768" ]
bind KP_MULTIPLY [fullscreenscript; cr1366]
Script to Run When a New Map Is Loaded
mapstartalways = [fog 1024; gibnum 4; echo "*** fog 1024; gibnum 4"]
checkinit mapstartalways [fog 1024; gibnum 4; echo "*** fog 1024; gibnum 4"]
Zoom In When Right-Clicking
By default, right-clicking is bound to [altaction], which is the scope when using the Sniper Rifle. You can bind this
to also zoom in with any other weapon, in addition to having it scope when using the SR. Here's the code:
alias scope [if (!= 5 (curweapon)) [fov 75; onrelease [fov 100]] [altaction]]
bind MOUSE2 [scope]
Binds for Various Modes
You can have binds for mods like CTF. I use the Numpad keys for these. For example, here are two useful
binds for the CTF mode:
bind KP4 [say "%>> FLAG leaving left side <<"]
bind KP6 [say "%>> FLAG leaving right side <<"]
Admin Scripts
Quickly get admin status:
alias saon [setadmin 1 PASSWORD]
bind N [saon]
alias saoff [setadmin 0]
bind M [saoff]
alias a1 [setadmin 1 PASSWORD1]
alias a2 [setadmin 1 PASSWORD2]
alias a3 [setadmin 1 PASSWORD3]
bind KP1 [a1]
bind KP2 [a2]
bind KP3 [a3]
To quickly get admin status, kick or ban a player by CN (client number), and then release admin status:
alias k [setadmin 1 PASSWORD; kick $arg1 $arg2; sleep 400 [setadmin 0]]
alias b [setadmin 1 PASSWORD; ban $arg1 $arg2; sleep 400 [setadmin 0]]
Send Game Info to Other Players
Here is a script that will send some info about your AC settings to other players via the say command, used for global chat:
alias myinfo [say My Info: AC $version | Resolution: $scr_w $scr_h | Sensitivity: $sensitivity | FOV: $fov | Gamma: $gamma]
Now you will only have to type /myinfo when you want to send this information to other players. You can add various
other information here.
Quick Weapon Selection Menu
The weapon selection menu can be opened by typing showmenu Weapons and you can bind it to a key:
bind L [showmenu Weapons]
Now you can just press L to open the weapons menu and make a quick pick.
Sample Config File
As an example, the following is part of my configuration file (download). I use
ESDF for movement, a few scripts for voicecom chat, several video settings like capped fps and not the maximum fov,
as well as few scripts to enhance playability, like the right-click zoom in script shown above.
Starting a Dedicated Server
Here is an example of how to start a dedicated server:
server.sh -x"ADMIN_PASSWORD" -n"SERVER_NAME" -o"MESSAGE_OF_THE_DAY" -c16 -r"$HOME/.assaultcube_v1.2/config/maprot.cfg" -B"$HOME/.assaultcube_v1.2/config/serverblacklist.cfg"
The server.sh script is located inside the root installation directory. Alternatively, you could use
the linux_server executable binary, located inside the bin_unix directory from within the root installation
folder.Replace ADMIN_PASSWORD with a password of your choosing, this will be used to have administration access to the server (by typing /setadmin 1 ADMIN_PASSWORD). Replace SERVER_NAME with the name you want your server to have, this will appear in the server browser. Change MESSAGE_OF_THE_DAY to an informative note about the server, like a greeting or a website link. This message will appear to every player who joins the server.
You can have a look at the official documentation section on starting your own AssaultCube server, as well as the command-line arguments that you can use.
Map Rotation File
The map rotation file (e.g. maprot.cfg) is a file which specifies what maps will be played, in what mode and for how long.
There should be a map entry on every line, with parameters separated by the : character. Here is an example:
ac_desert:11:12:1
ac_favela:5:10:1
map:mode:time:allowVote[:minplayer[:maxplayer[:skiplines]]]
However, the values between the [ and ] parantheses can be excluded, so you can only add them as shown above, in the
map:mode:time:allowVote format.The following is a complete list with the numbers corresponding to each game mode:
- 0 - TDM
- 2 - DM
- 3 - Survivor
- 4 - TS
- 5 - CTF
- 6 - PF
- 9 - LSS
- 10 - OSOK
- 11 - TOSOK
- 13 - HTF
- 14 - TKTF
- 15 - KTF
- 16 - TPF
- 17 - TLSS
ac_power:13:10:1 // HTF, 10 minutes, allow votes
ac_douze:10:10:1 // OSOK, 10 minutes, allow votes
ac_shine:0:10:1 // TDM, 10 minutes, allow votes
Custom Maps
Custom maps can be downloaded and put inside the packages/maps/servermaps directory. Maps which are uploaded in-game
by users using the sendmap command will be put inside the packages/maps/servermaps/incoming directory. Maps
usually will consist of a compressed Gzip archive ending in the cgz extension, and an eventual config file
ending in a cfg extension. The config file specifies variables to be used on that specific map by the client, overriding
default settings. So for example if your fov variable is set to 400, but the cfg file for a specific map sets it at 280, then
this value will be used, overriding your settings.The packages/maps/servermaps directory is located inside the root installation directory, or you can create it manually inside the $HOME/.assaultcube_v1.2 folder.
There are hundreds of good community-created maps over at ac-akimbo.net, some of the more popular ones include ac_valencia, ac_duel, ac_favela, ac_savana, ac_casa2, ac_safari, bs_dust2, camper, TwinTowers.
Installation
Ubuntu 13.10 comes with AssaultCube 1.1.0.4, so to install the latest version you will have to download
the archive from
here,
uncompress it and then run the assaultcube.sh script to start it.
tar -xjf AssaultCube_v1.2.0.2.tar.bz2
cd AssaultCube_v1.2.0.2
./assaultcube.sh
Tips
These are various tips gathered from the forums or from online players:Tip: Throwing a nade on your head won't get you killed.
Tip: For some players maxroll 20 works better in OSOK or TOSOK than the default value (0).
Tip: Rifle sprinting backwards is most useful in CTF modes when running away with the enemy flag.
Tip: Scripts inside the config directory from the installation folder are a great resource to learn scripting.
Tip: By default, the crosshair is white when your HP is over 50, turns orange when your HP is between 25 and 50, and turns red when your HP is under 25. To disable this behavior, use the crosshairfx 0 command. (Thanks to Waffles for this tip)
Tip: In HTF and KTF modes, pressing ALT to show the minimap will also show you the enemy flag bearer.
Tip: Crouching before the peak of a jump will give an extra boost. Useful to jump from platform to platform on various maps, especially on ac_douze.
Tip: It helps a lot to know the maps and the location of pick-ups.
Tip: Nade trickjumps, although hard to perform in a real game, can get you to places otherwise unreachable.
Tip: You can change the bot names in single-player by editing the bot/bot_names.txt file and adding one nickname per line.
Tip: Having 26+ armor doubles the amount of damage which will not be drained from your HP, from 16% to 33%.
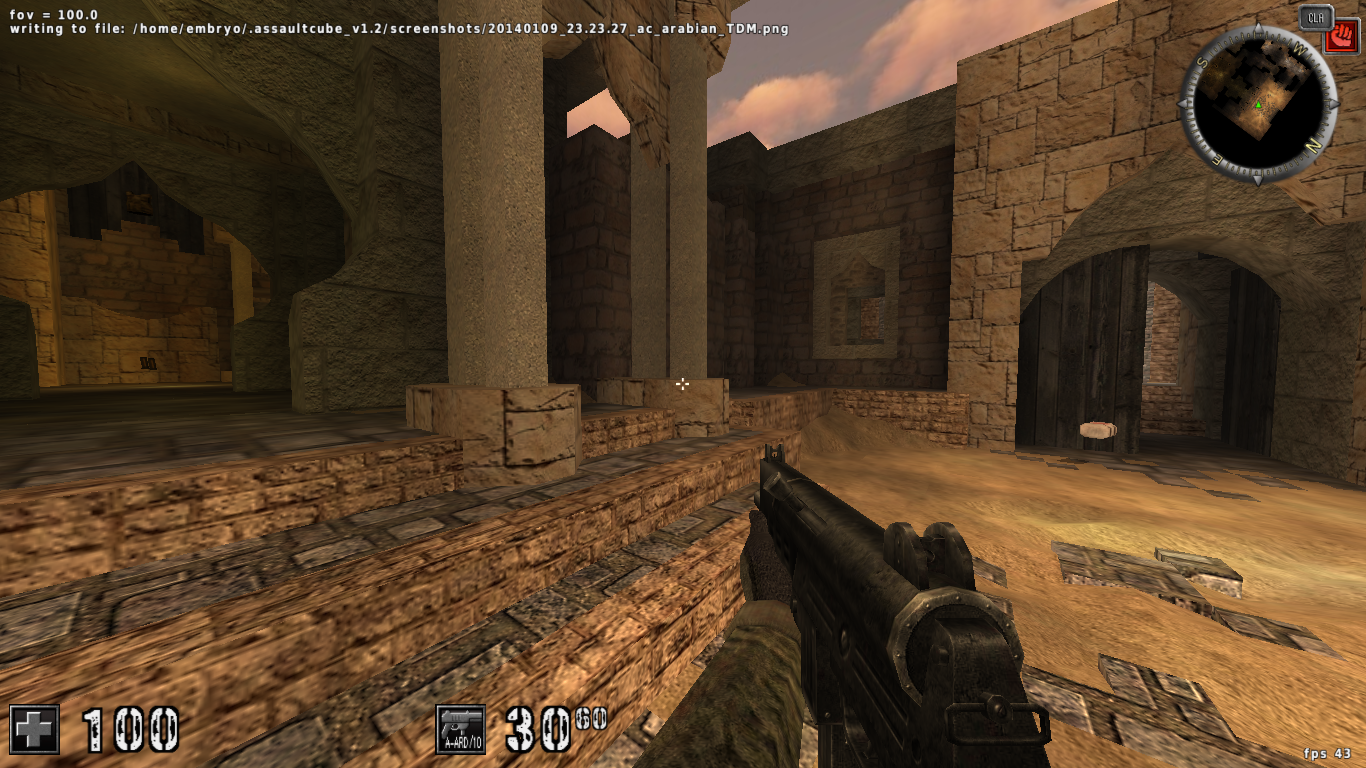
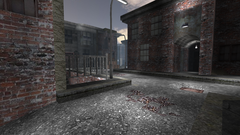
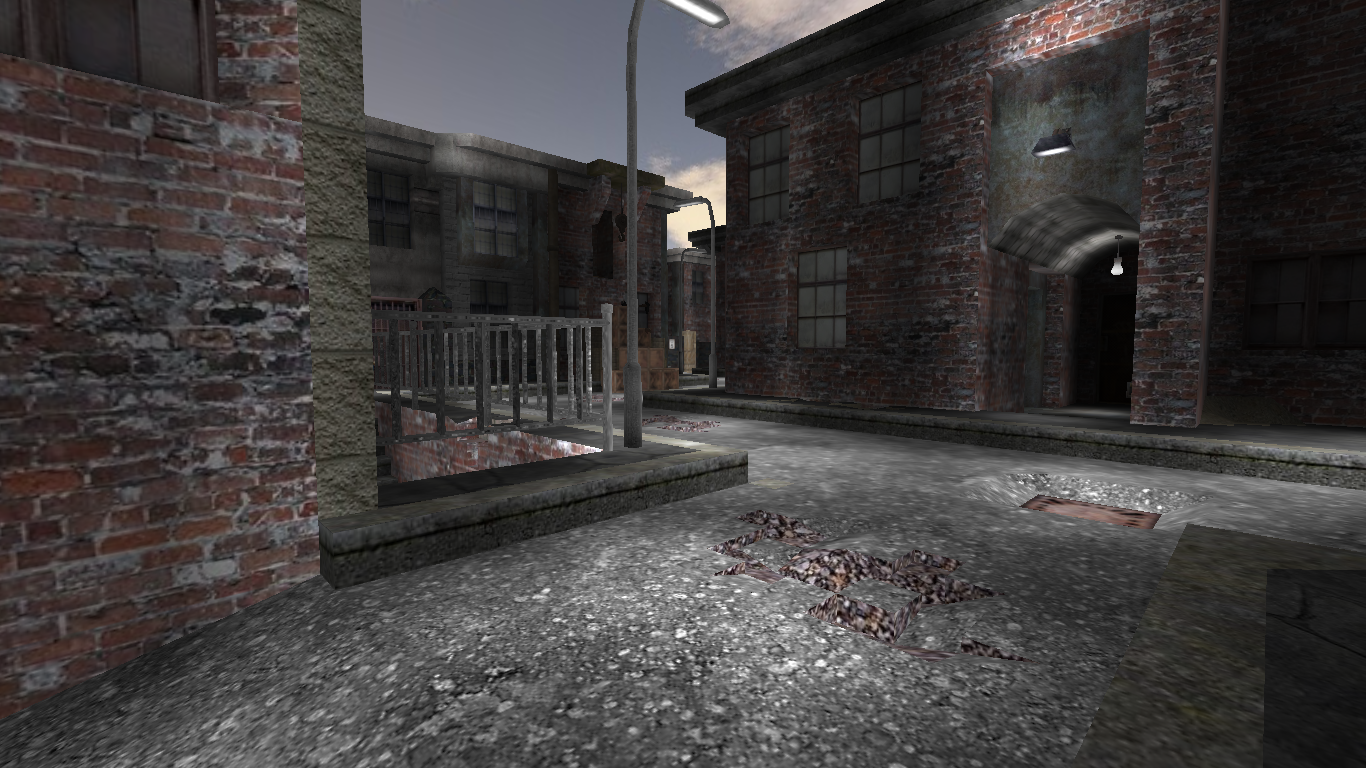
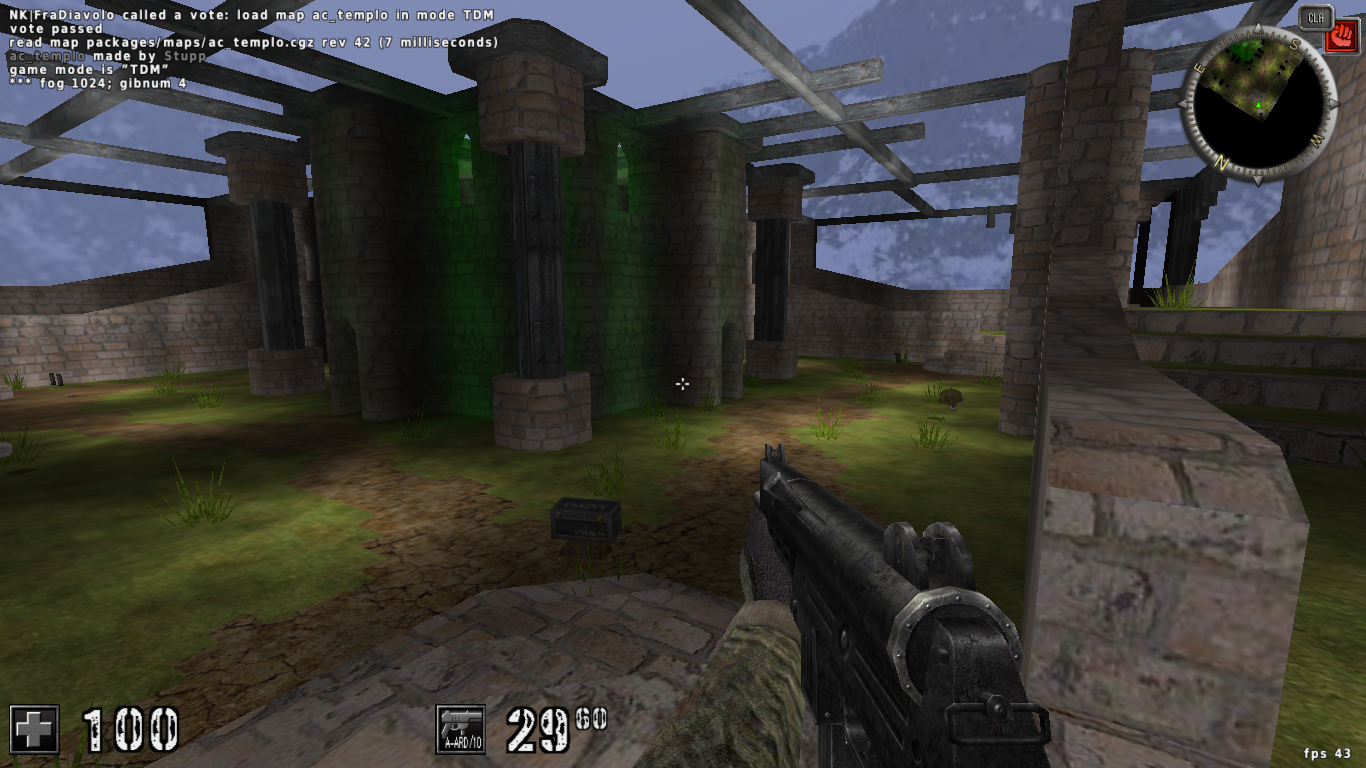
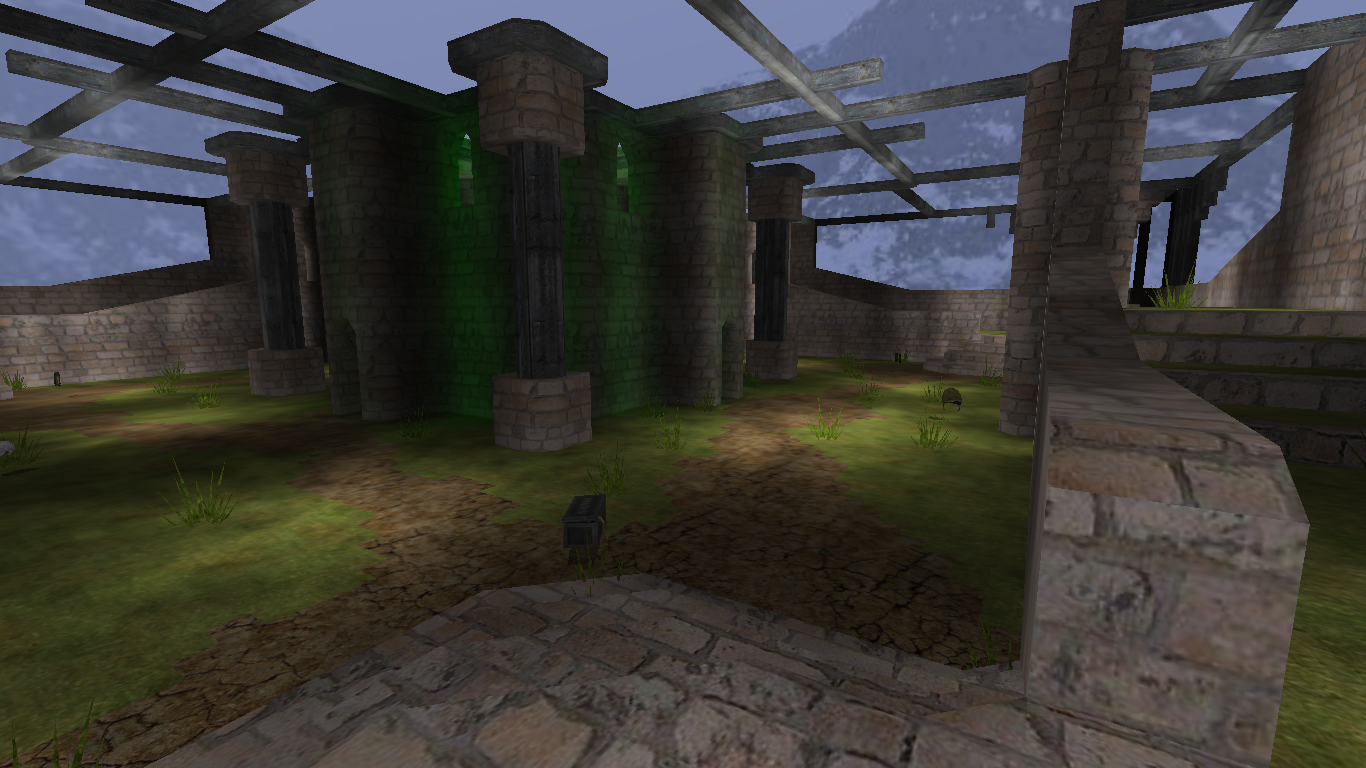
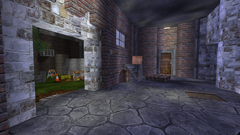
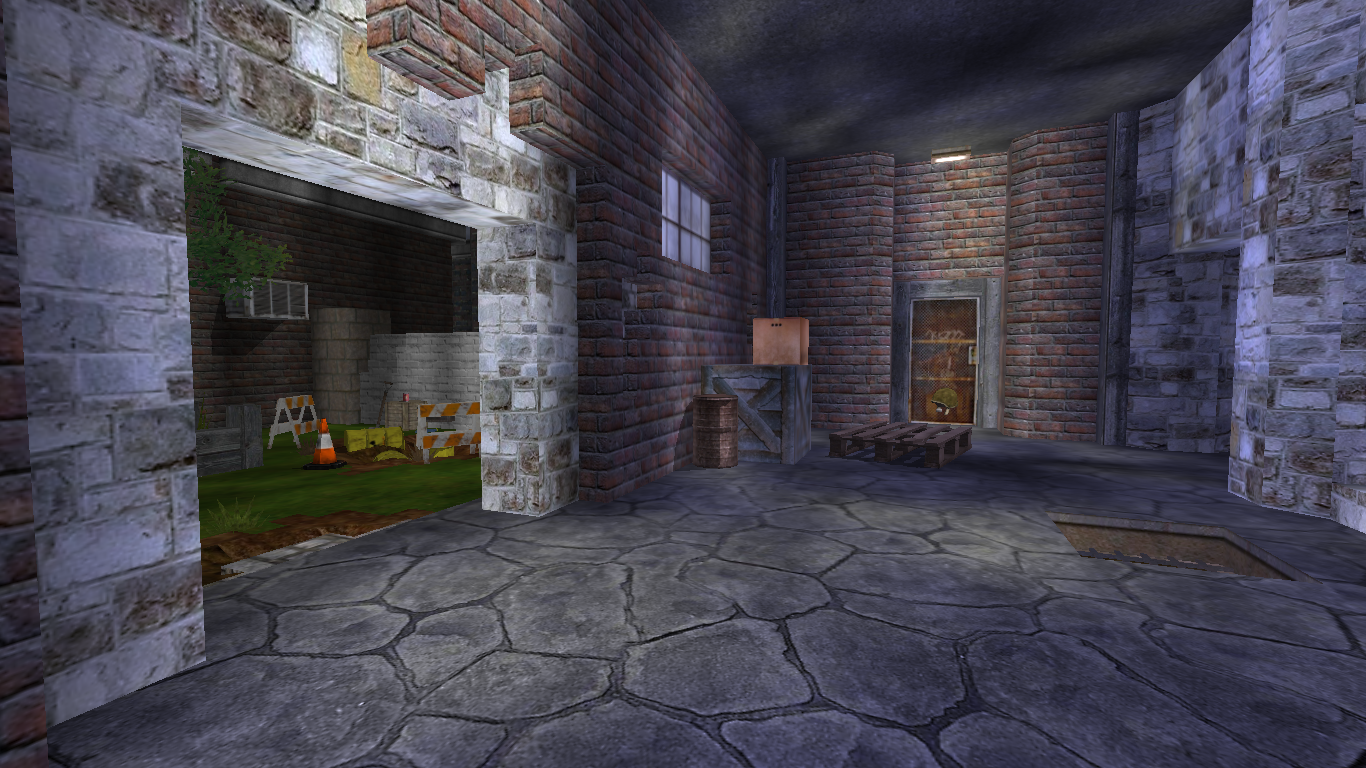
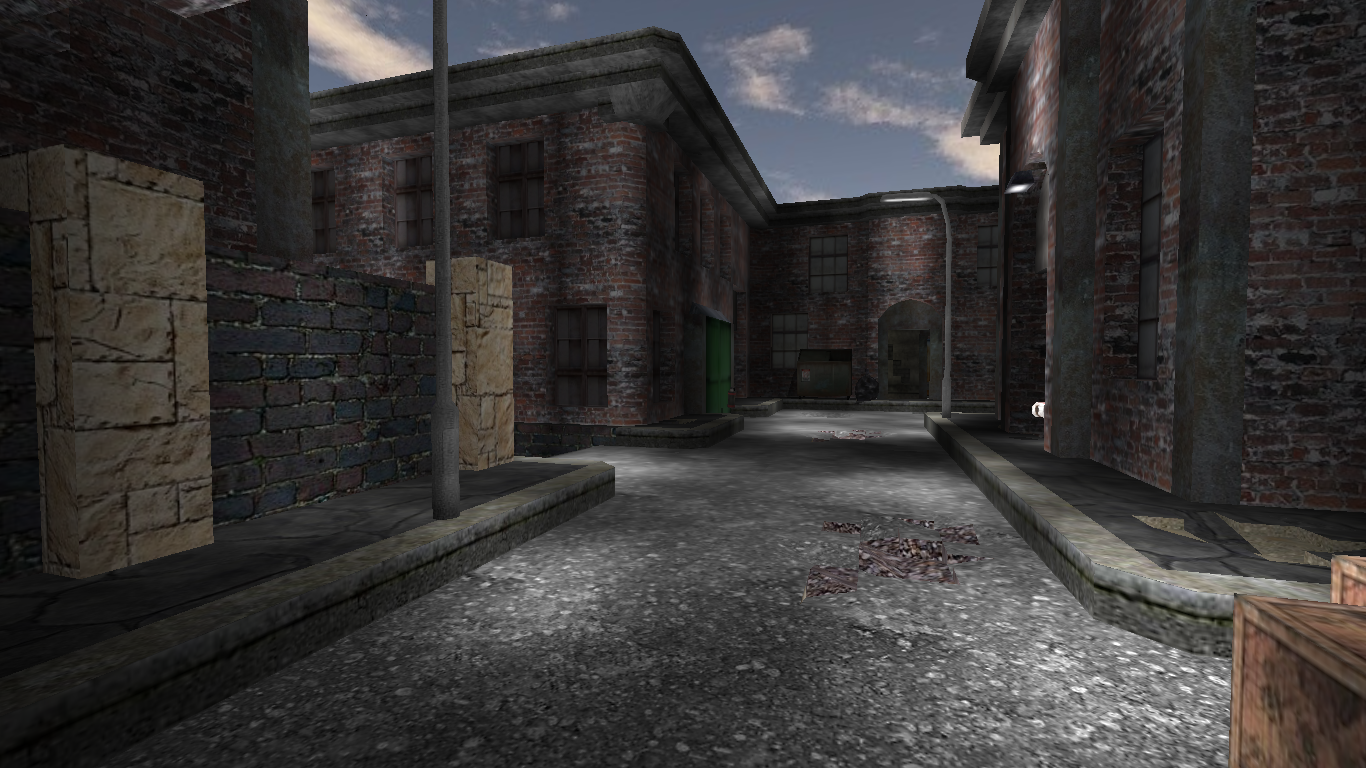
Screenshots


Resources
- AC-AKIMBO.net - Maps, Mods, Scripts, Skymaps, Textures and Mapmodels
- Quadropolis.us - Cube engine mapping, modding and mayhem
ChangeLog
v0.2.4 r4 (Jan 15, 2014)- added pick-ups, armor info
- added weapon RT, TBS, TTK, more weapon info, damage info
- added voting info, maprot info, config info
- added several new commands, admin scripts
- added tips
- added new screenshots
- several spelling fixes
v0.2.2 r1 (Jan 10, 2014)
- initial version
TODO
- adding/modifying menus
- AC etiquette
- AC funny quotes
- more detailed modes info
- settings menus info
- server browser shortcuts